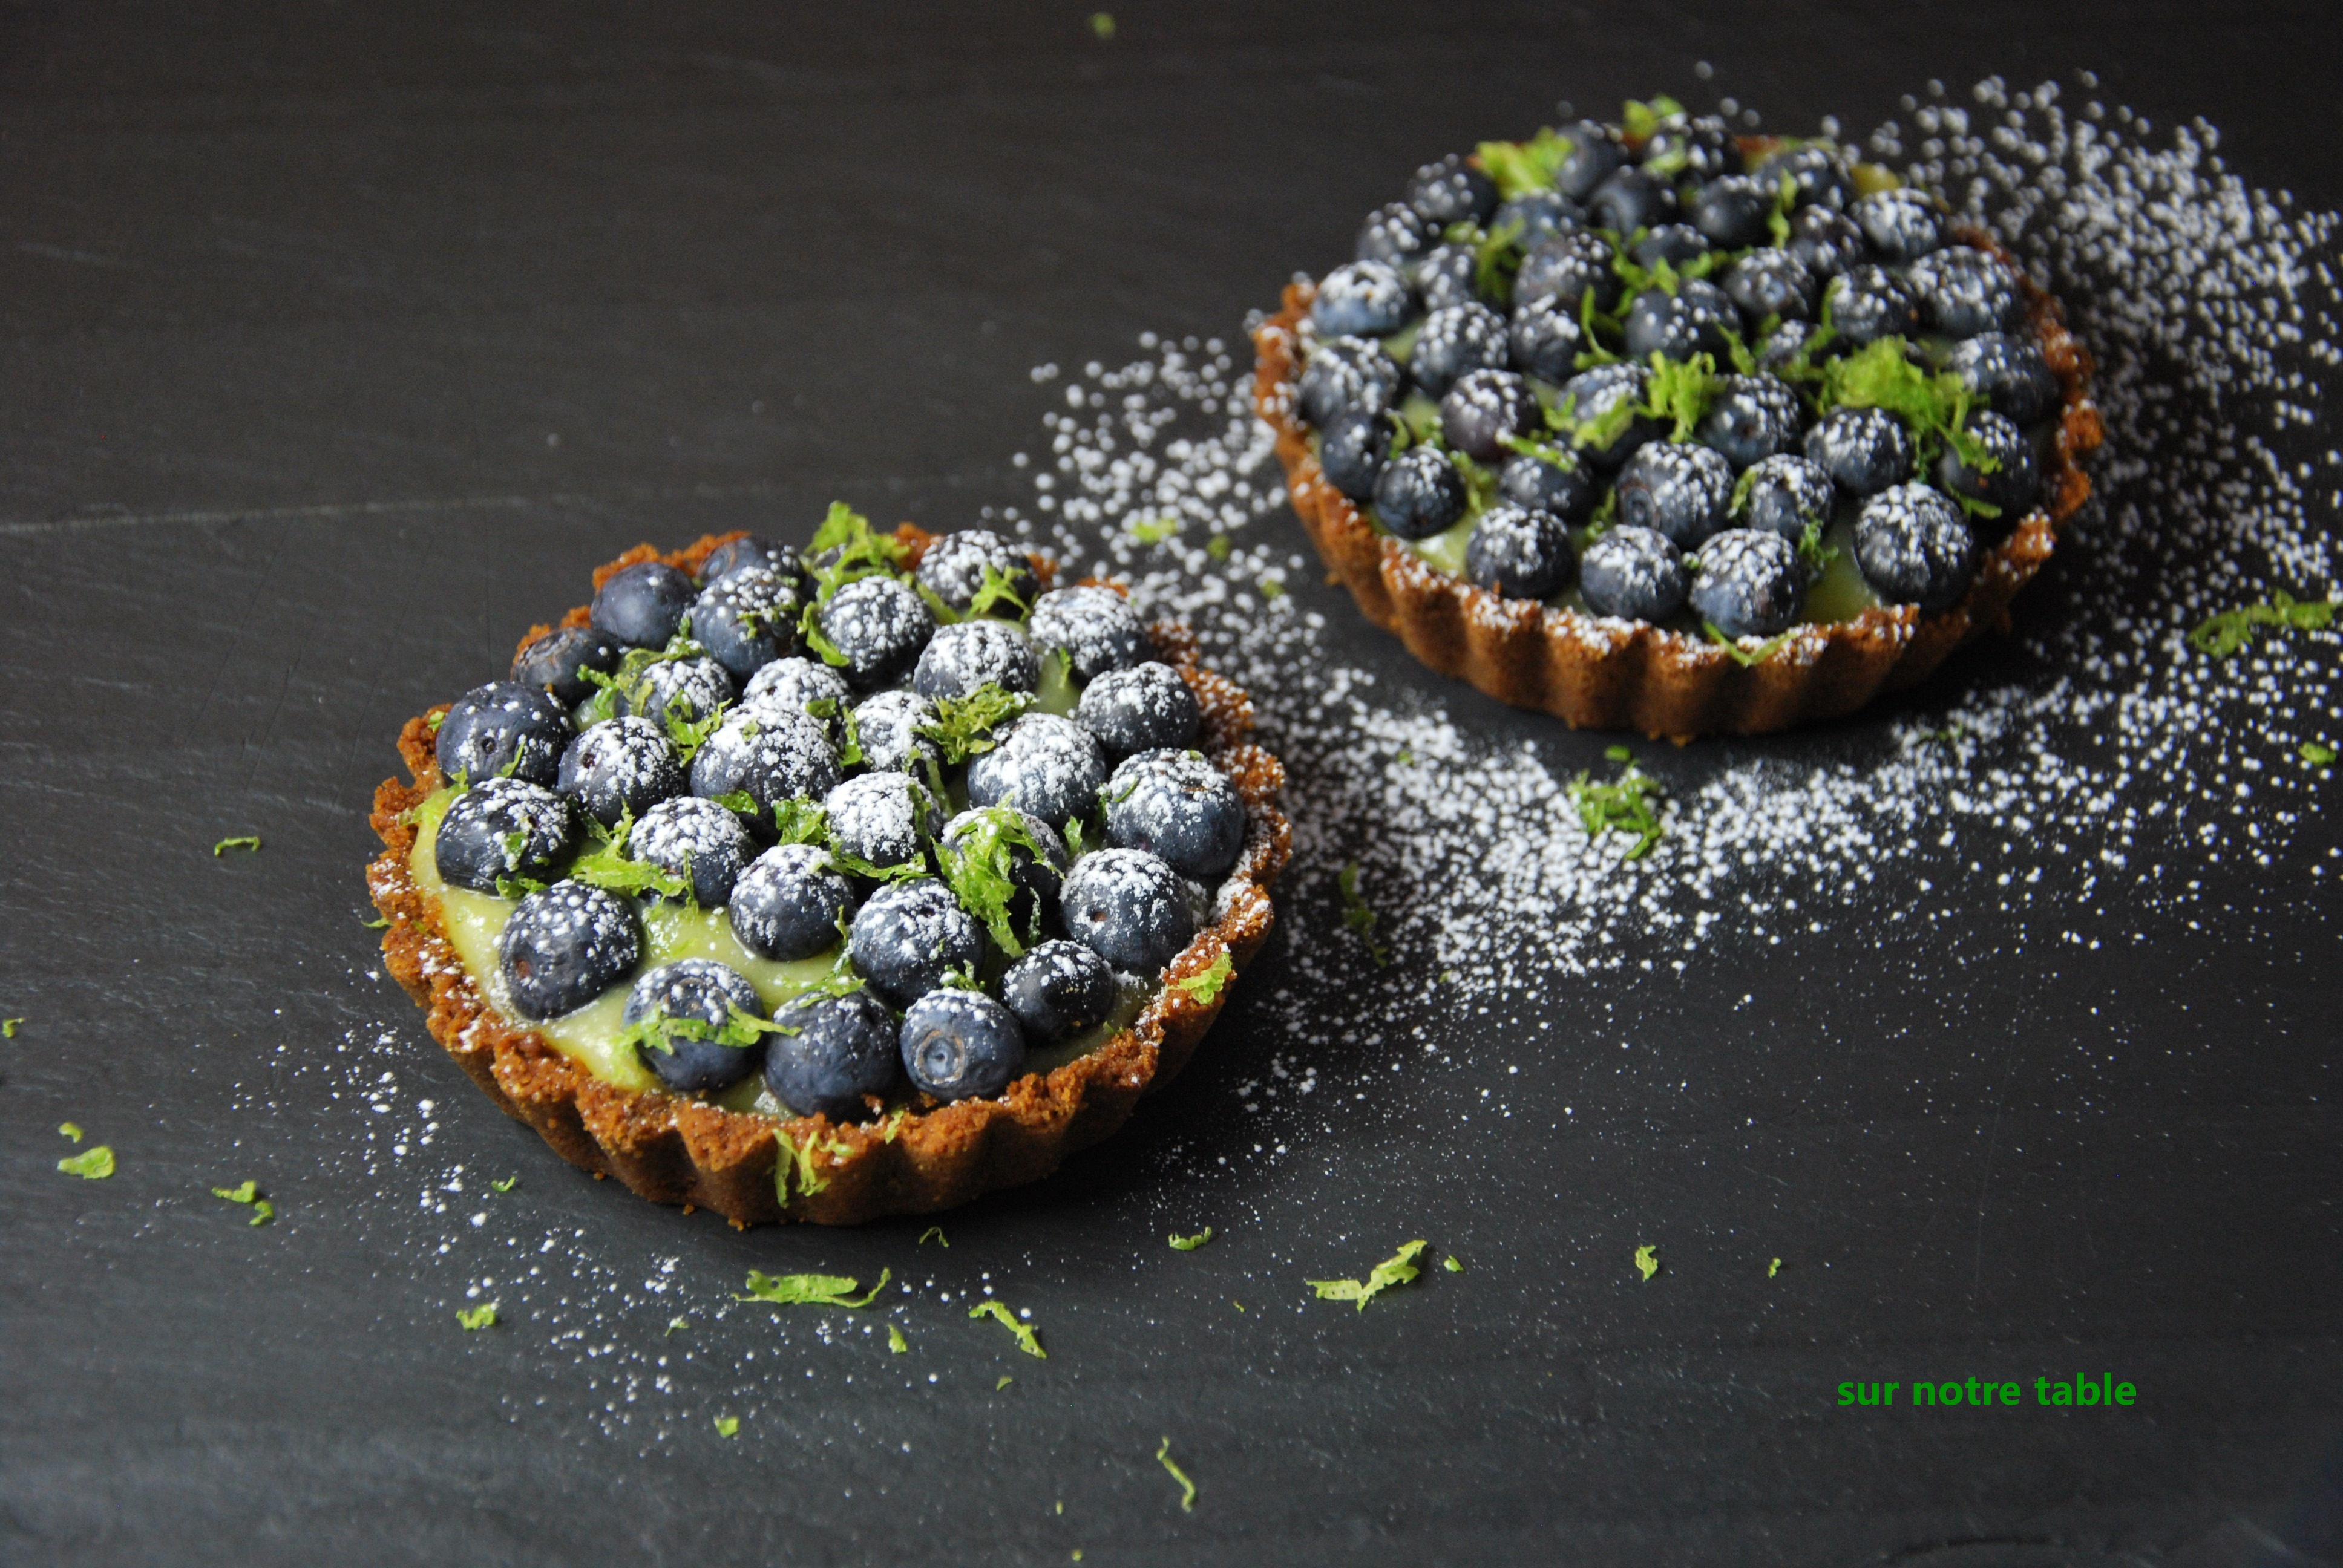
blueberry lime tartlets
I know blueberries aren’t in season yet in Quebec, and it’s not summer yet, but I just can’t wait any longer to share this little gem of a pie! It not only looks impressive but it is truly scrumptious.
Yes, these tartlets do scream summer but you can still make them now, as there are always blueberries available from California. Plus it’s not really the blueberries that make these pies shine, it’s the lime curd. The lime curd brings to the pie both tartness and sweetness in a wonderfully refreshing combination. The lime curd is so good that if you have any leftover you can just eat it on its own with a spoon!
These pies will not only impress your guests but, most importantly, will make it easy for you, as you can prepare them in advance and refrigerate until you’re ready to serve them. The only special equipment you will require; are individual tartlet pans with removable bottoms.

blueberry lime tartlet
ingredients:
tartlets
- 10 oz (285 grams) gingersnap cookies (about 40 cookies)
- 6 tablespoons unsalted butter, melted
- 2 cups fresh blueberries
- lime curd (see below)
- zest from 1 lime
- powdered sugar for dusting
lime curd
- 1 cup sugar
- 2 whole eggs
- 4 egg yooks
- ½ cup cold unsalted butter, cut into small pieces
- ½ cup fresh lime juice

blueberry lime tartlet
- Preheat oven to 350oF.
- In a food processor or blender, grind gingersnap cookies into fine crumbs. Transfer to a medium bowl and add melted butter and combine thoroughly.
- By using hands press gingersnap mixture into bottoms and sides of tartlet pans with removable bottoms. If you use 4 inch tartlet pans you will have enough crust mixture and lime curd for 6 tartlet pans. If you use slightly larger tartlet pans which are 4 ¾ inches you will have enough to make 4 tartlets.
- Bake until crusts are deep gold, which is about 12 minutes. Transfer to a wire rack and let cool completely.
- While crusts are baking you can start making the lime curd. In a medium bowl mix sugar, whole eggs, and egg yolks.
- In a small saucepan over low heat, combine butter and lime juice and keep stirring until butter melts.
- Add egg mixture to saucepan and cook on low, stirring constantly until mixture has thickened and coats the back of a wooden spoon, about 8 minutes. Remove saucepan from heat. Transfer lime curd to a bowl and cover bowl with plastic wrap where you press it onto the surface of the curd, then refrigerate until ready to use.
- Once cooled, remove tartlets from their pans and fill each with lime curd. Top each tartlet with blueberries and lime zest. Add a squeeze of lime juice over each tartlet and then dust with powdered sugar just before serving.
Note: if you have any leftover lime curd after you have filled the tartlets, just keep it in the bowl and cover bowl with plastic wrap as done above and refrigerate until ready to eat. You can then just spoon the lime curd on a sugar or butter cookie if you desire, or do as I do, eat it on it’s own with a spoon! Just decadent!