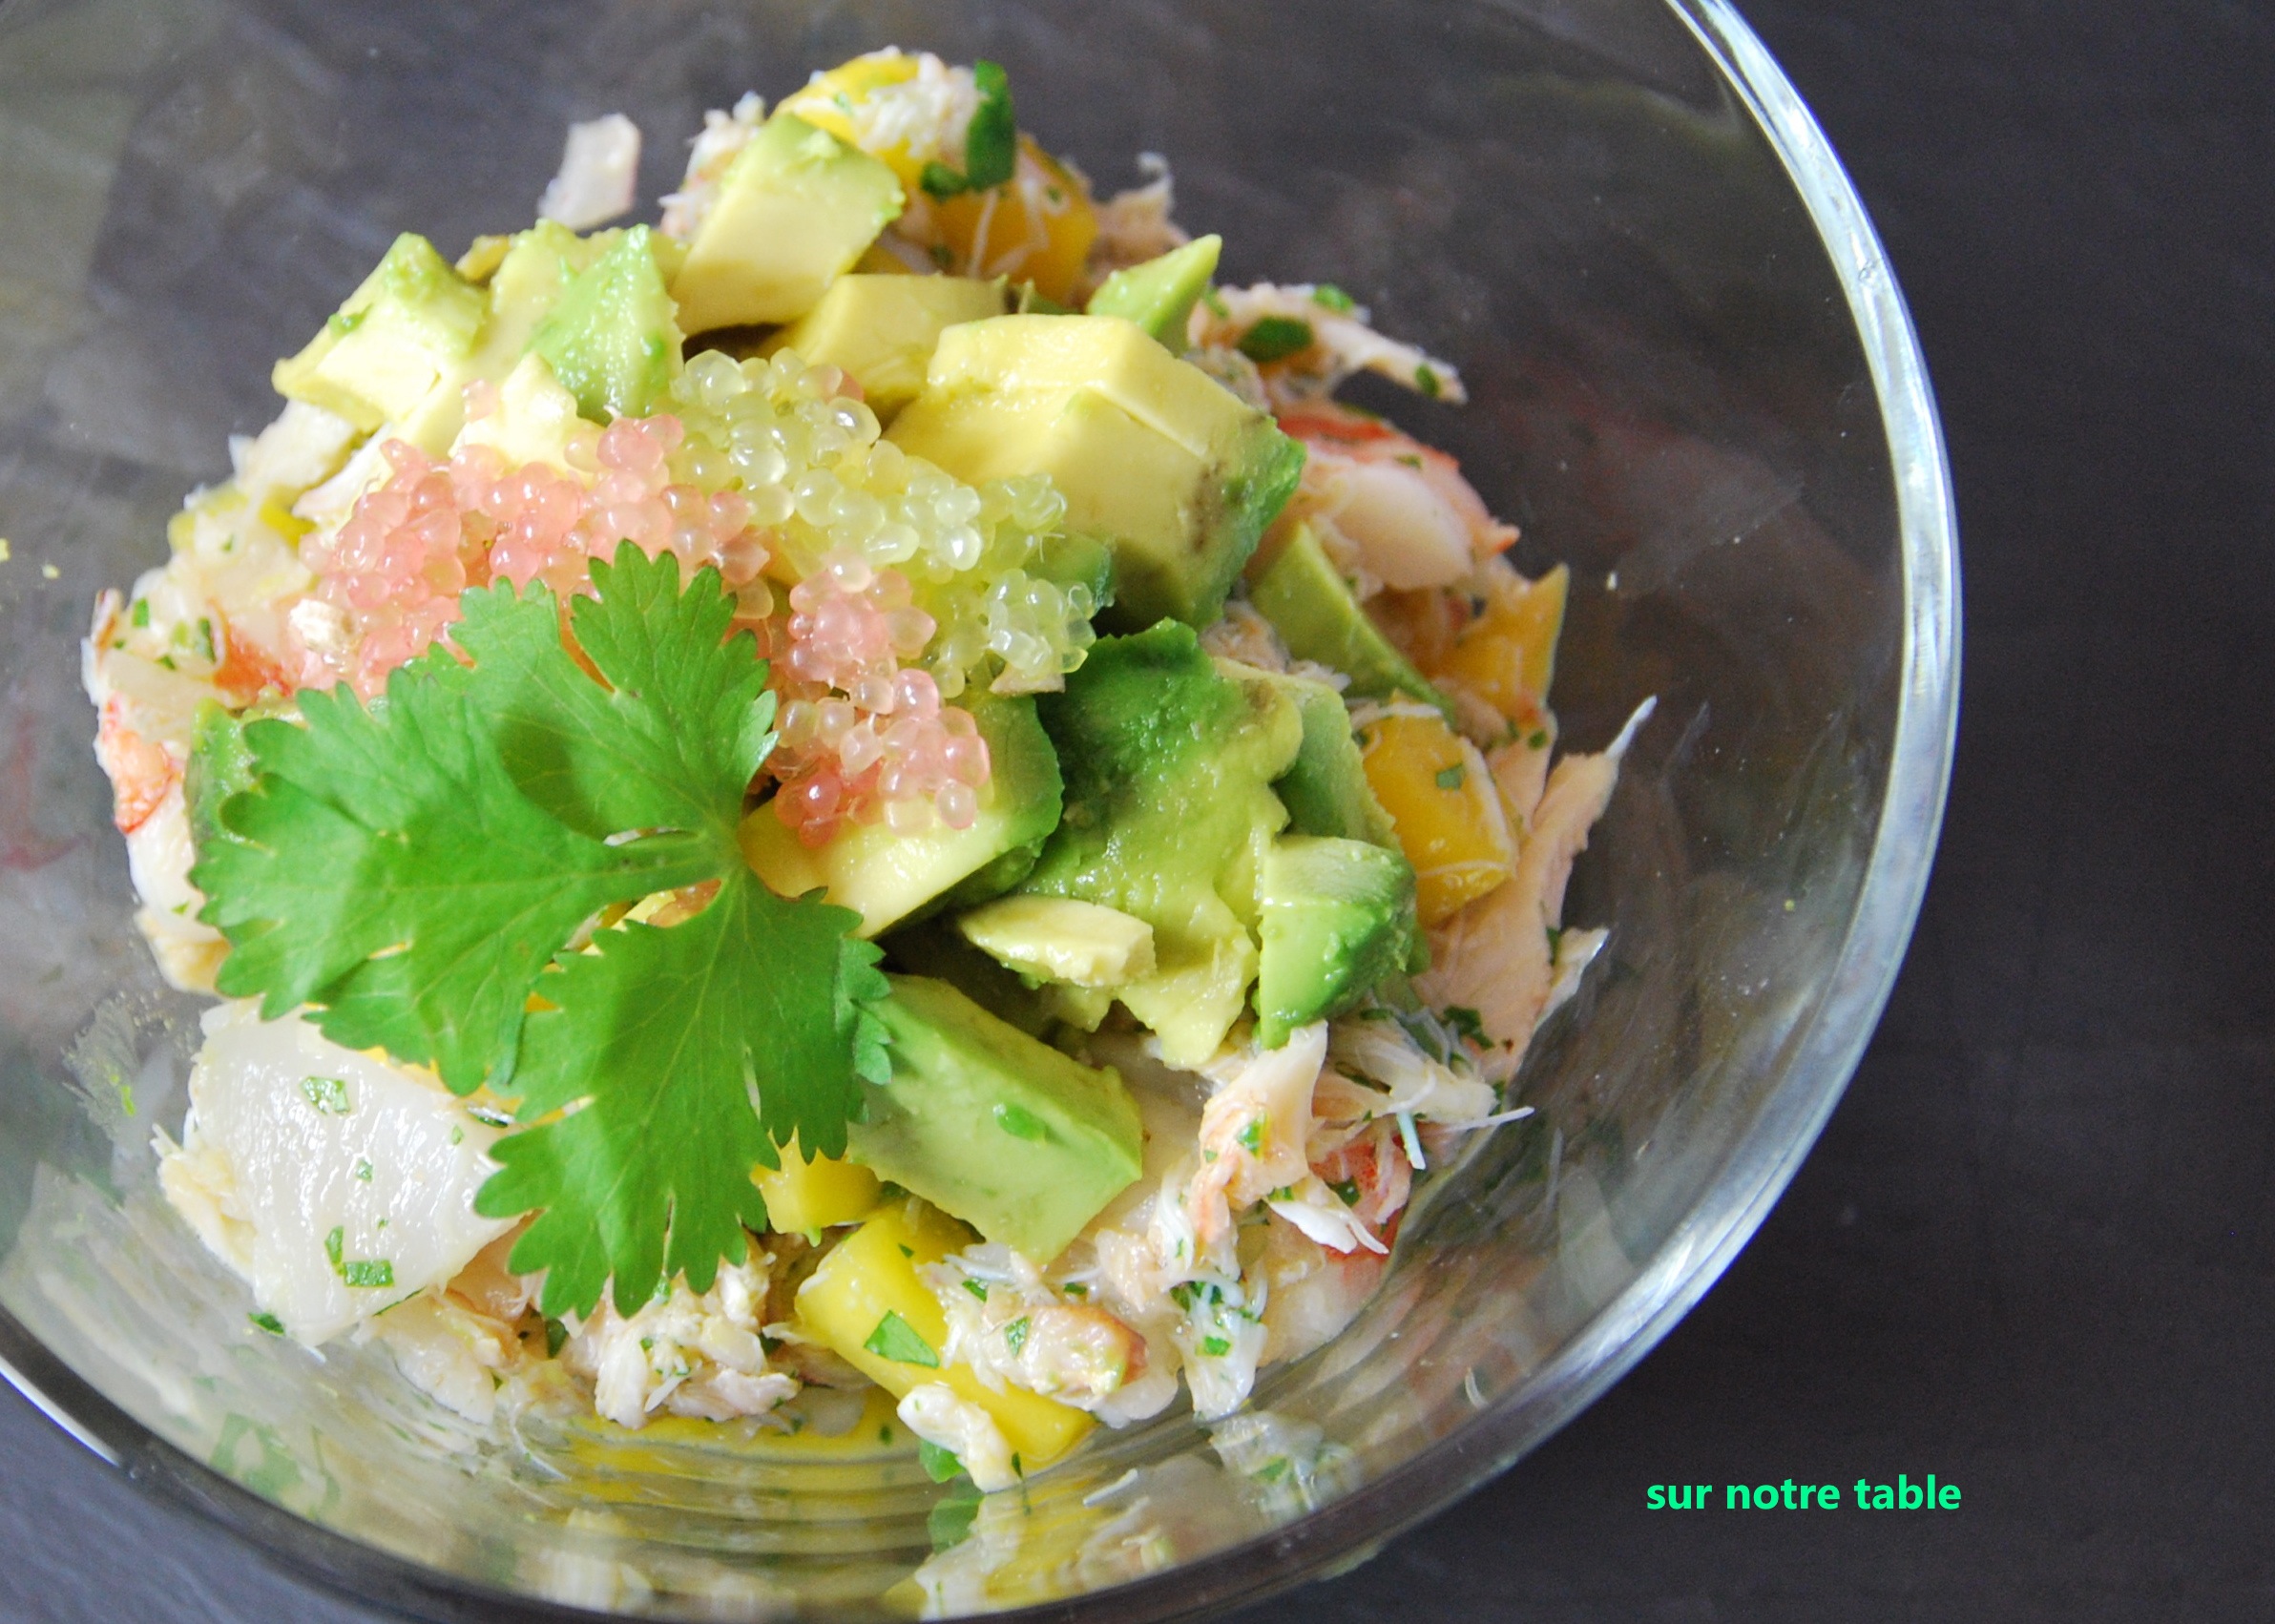
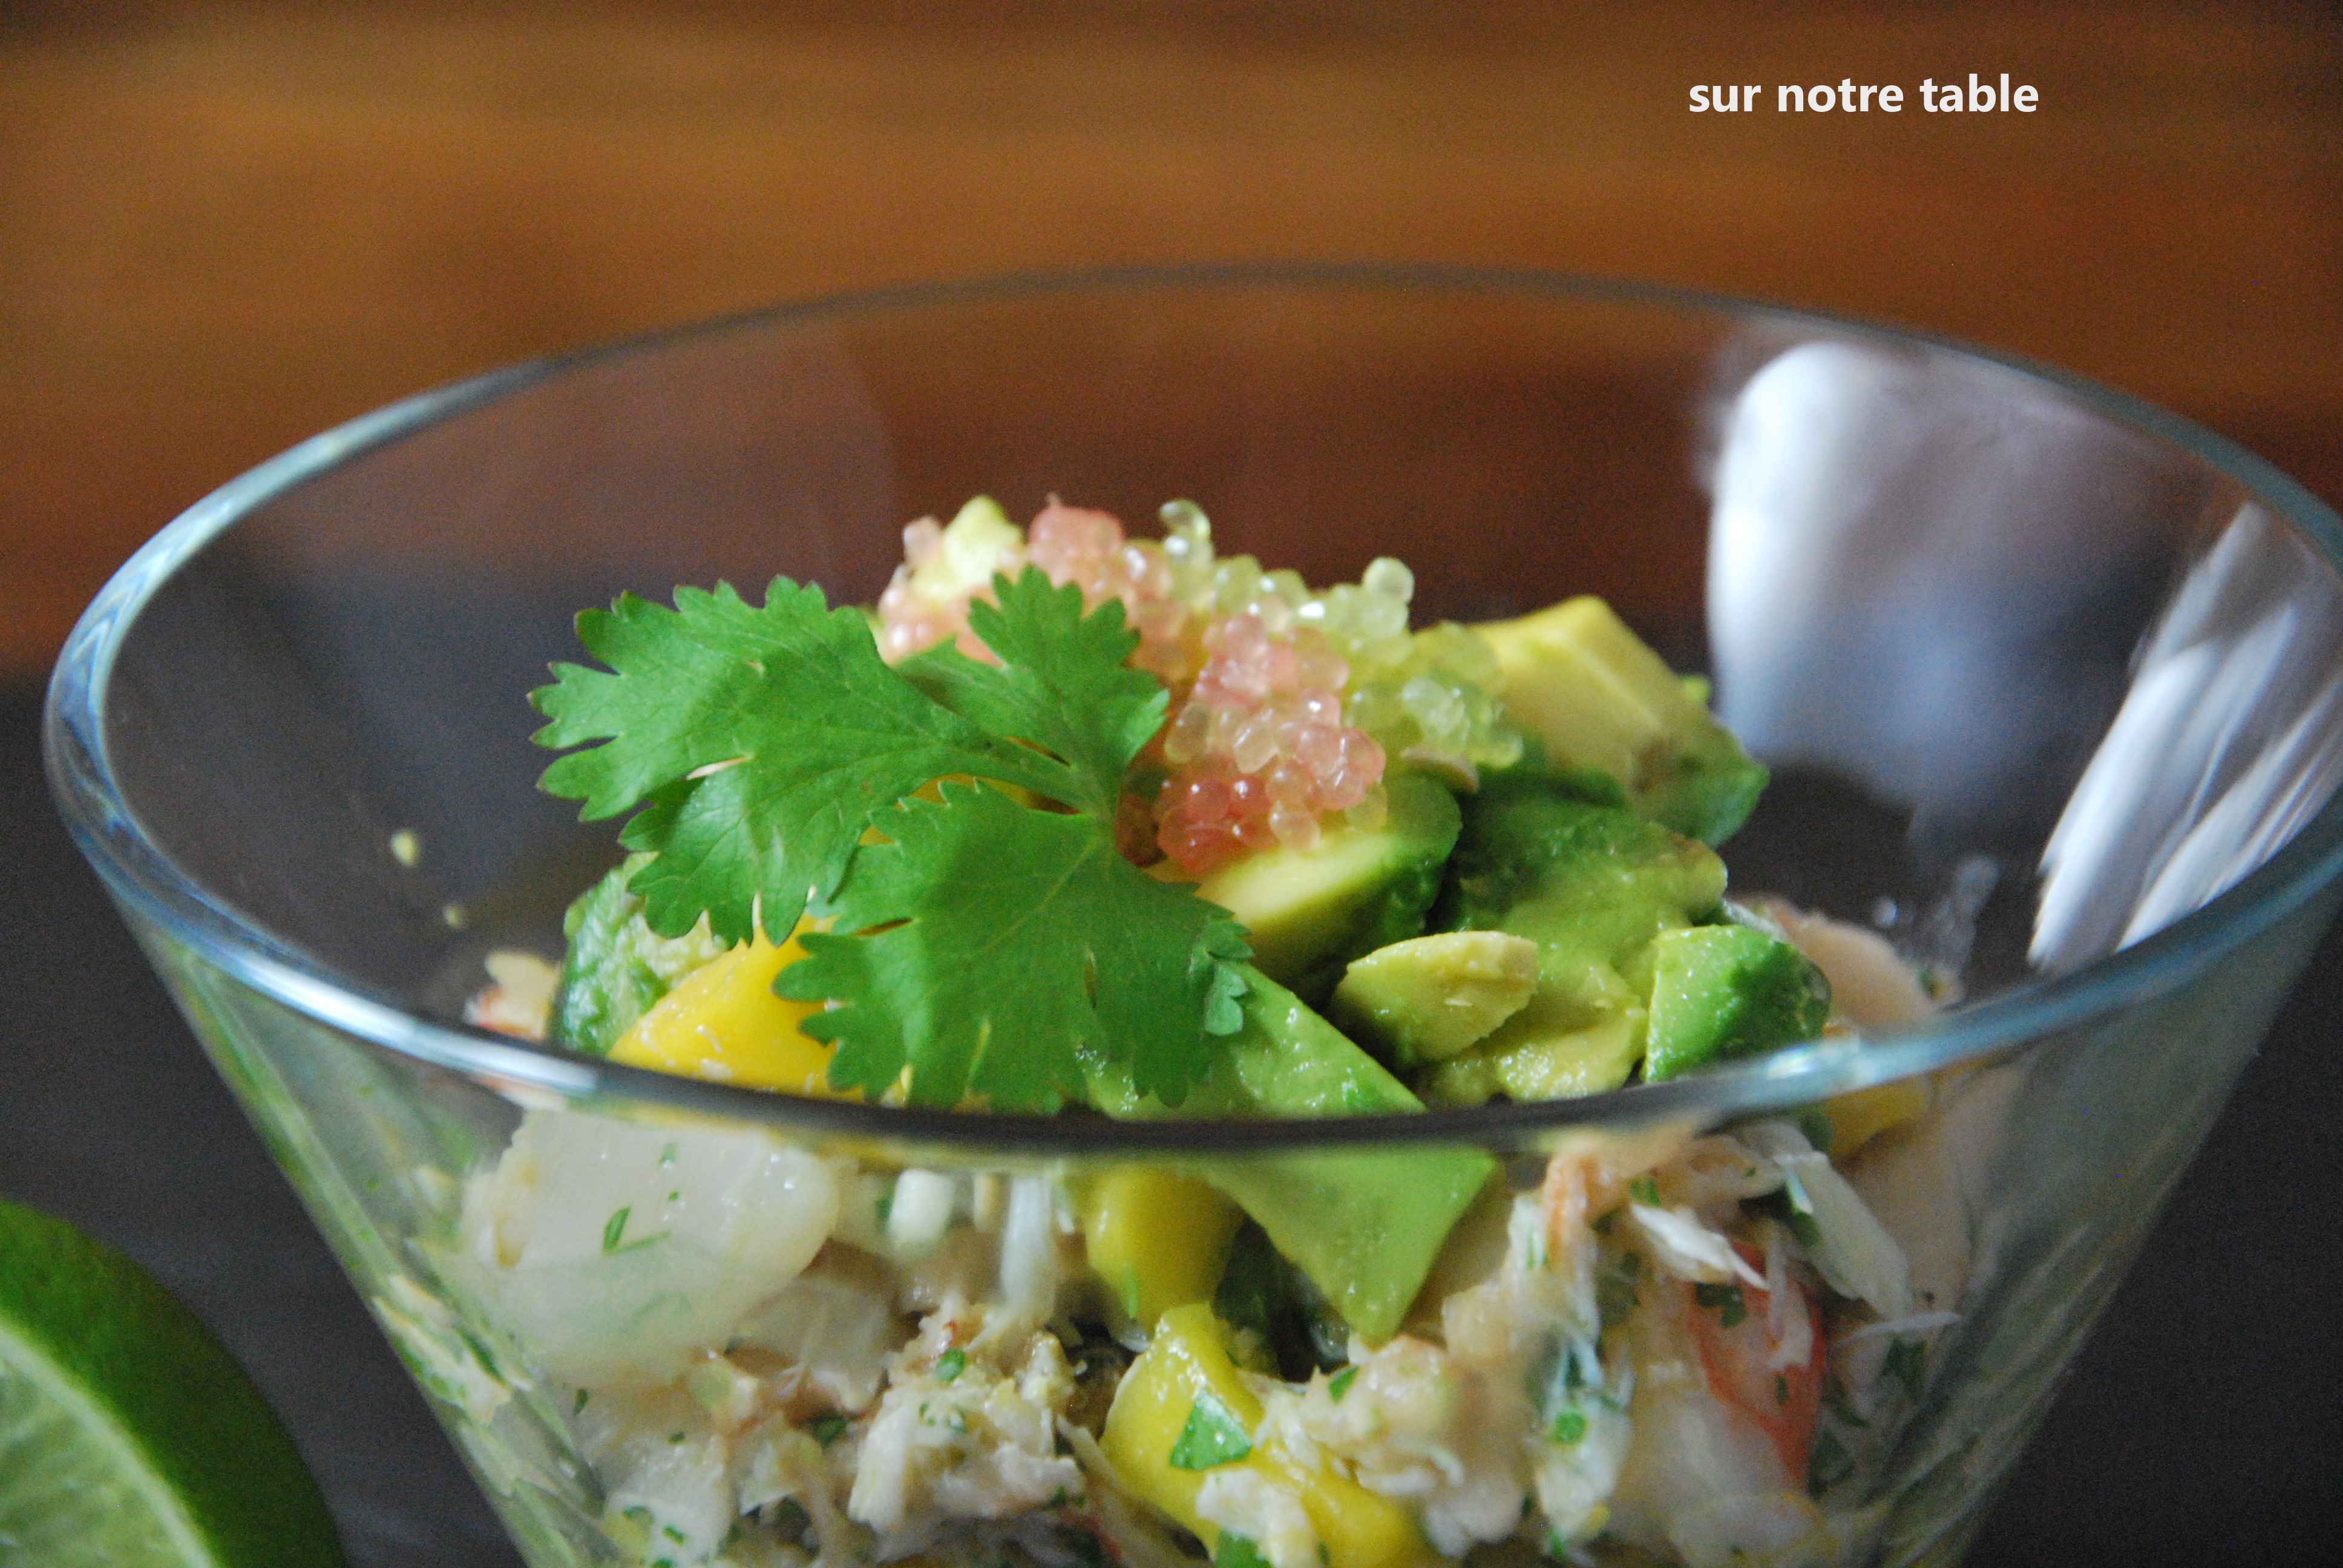
shrimp, crab and avocado appetizer
The first signs of spring signal the arrival of fresh snow crab here in Montreal, which means it’s a great time for crab cakes or one of my favourite combination of ingredients, a salad of crab, shrimp and avocado. Now there are many different interpretations of these three ingredients but here’s a fresh take which will be a lot more exciting for your tastebuds.
You can also add another level of texture to this recipe by topping the salad with finger lime caviar beads. The finger lime is a cylindrical citrus fruit originating from Australia. The fruit is filled with caviar beads of pink or green color, which has a juice that is acidic and similar to that of a lime. They are not easy to find because of its Australian origin, however the availability of the finger lime is expanding as they are now being grown and harvested in California. Adding finger limes to this recipe is a lot more fun than a lime wedge as the little beads pop and burst and ouze lime juice as you eat them.

finger lime caviar
This recipe is easy as 1, 2, 3, as it only requires cutting and mixing the ingredients. The only time-consuming effort in this recipe is picking the crab meat from fresh cooked crab shells. However you can skip this step and save yourself some time by buying fresh lump crabmeat from the grocery store that is pre-packaged and pasteurized. Obviously you wouldn’t use this stuff for a seafood platter however it’s perfect for this type of salad or a crab cake. When refrigerated and unopened this pasteurized crab meat can last up to a year or so, however when opened it has to be eaten within 3 to 5 days.
Recipe serves 2
ingredients:
- 1 mango, cubed
- 2 tablespoons extra-virgin olive oil
- 2 tablespoons rice wine vinegar
- 2 tablespoons fresh lime juice
- 2 tablespoons cilantro, minced and few sprigs for garnish
- ½ jalapeno chile, minced
- ½ shallot, finely minced
- salt and ground pepper
- 4 – 6 cooked medium sized shrimps, peeled and diced
- ¼ cup fresh crabmeat, picked and shredded (or pasteurized lump crabmeat)
- 1 avocado, diced
- finger lime caviar from 2 finger limes (optional)
- lime wedges for serving
crab, shrimp and avocado appetizer
- In a medium sized bowl mix diced mango, olive oil, vinegar, lime juice, cilantro, jalapeno and shallot. Season with salt and pepper.
- Add shrimp and crabmeat to bowl and combine.
- In small serving vessels or bowls first layer crab mixture, then spoon avocado on top and garnish with finger lime caviar or lime wedge if finger limes are not available. Then top with a cilantro sprigs and serve immediately.
Voila! Makes for an easy appetizer anytime of the week.